
If you’re searching how to install an aluminum fence, there’s a good chance your yard is not perfectly flat. And slopes are where fence projects either look crisp and premium or end up with ugly gaps, awkward stair steps, and posts that drift out of alignment over time.
The good news is that sloped installs are very solvable if you decide early whether you’re going rackable (follow the slope) or stepped (level panels with drops between sections). The right choice depends on your grade, your priorities (privacy, aesthetics, cost), and what your fence system is designed to do.
PrimeAlux is built around a modular, ready-to-assemble approach, with accessories specifically intended to handle angles, curves, and different installation methods (underground or on-ground).
Quick summary / key takeaways
- Rackable runs follow the slope and usually look smoother, but they can create larger bottom gaps on steeper grades if not planned.
- Stepped installs keep panels level, but create visible “stairs” and may need more planning around transitions.
- Your layout and post setting decide the outcome more than the panel itself. Straight lines and consistent post spacing matter.
- PrimeAlux shows dedicated slope hardware that allows installation at angles up to 45 degrees.
How to install an aluminum fence on a slope: rackable vs stepped
Before you dig a single hole, decide what “good” looks like.
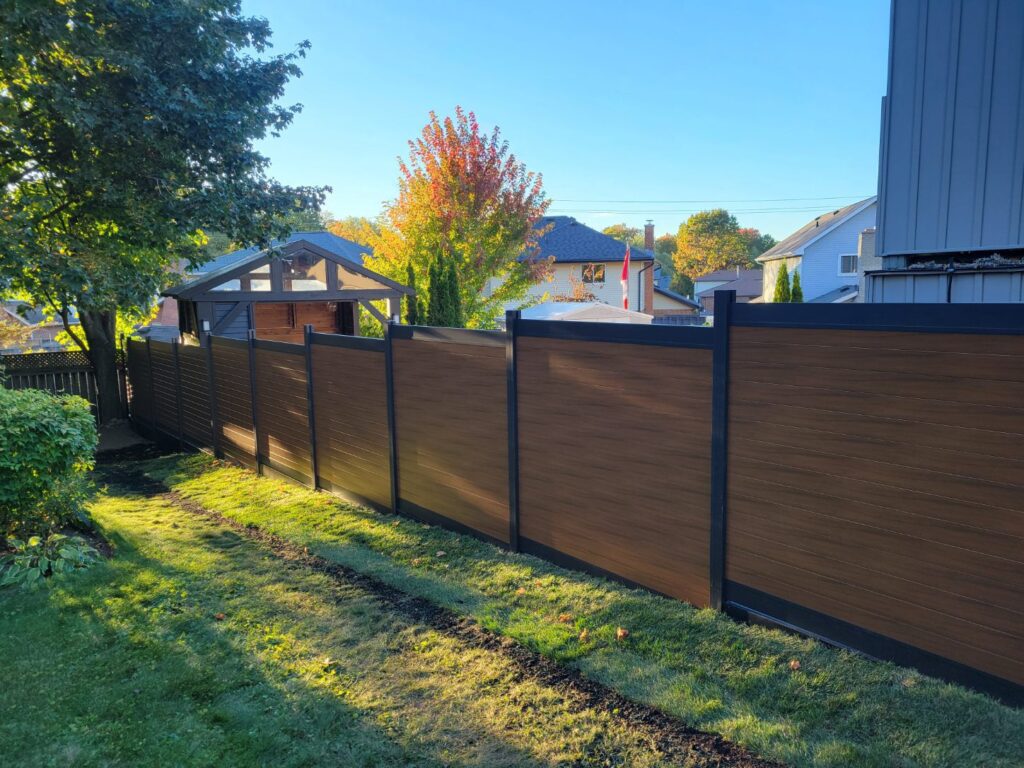
Rackable panels
Rackable installs angle the panel line so the top rail and pickets follow the grade. Visually, it reads modern and continuous, especially for horizontal styles.
Best when:
- The slope is moderate and consistent.
- You want a smooth sightline across the run.
- You can tolerate a controlled bottom gap, or you can grade to reduce it.
Watch-outs:
- On steeper slopes, the downhill end can lift and create a noticeable gap at the bottom. That matters for pets, pool zones, and privacy expectations.
- If you rack too aggressively without system support, you can introduce stress at rails and connections.
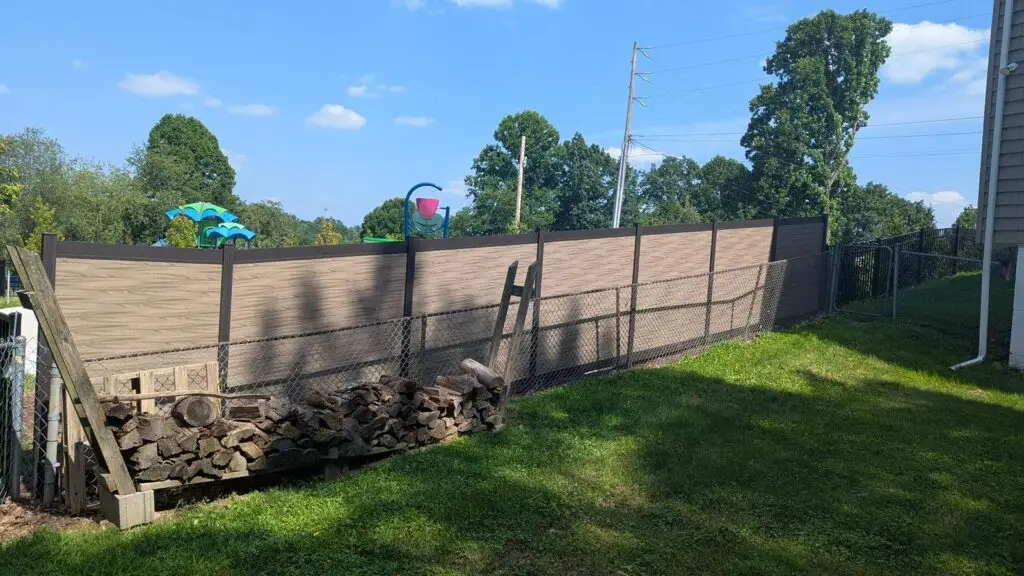
Stepped panels (level sections with drops)
Stepped installs keep each panel level. The fence “stairs” down the hill section by section.
Best when:
- The slope is steep or changes often.
- You need tighter control at the bottom edge (privacy, pet containment, or code-driven clearance).
- You want each panel to remain perfectly plumb and square.
Watch-outs:
- The stepped look is more noticeable, especially with long runs.
- Transitions can look choppy unless you plan section lengths intentionally.
Start with a slope plan, not a fence plan
A clean sloped install starts with measurement.
Do this first:
- Run a string line or laser along your intended fence line.
- Measure total elevation change over a known distance (example: 12 inches over 20 feet).
- Identify where the grade changes suddenly (retaining walls, swales, patio edges).
Decision rule that helps:
- If your grade change is gradual, rackable often looks best.
- If you have abrupt changes or you cannot accept bottom gaps, stepping often behaves better.
Posts, footings, and anchoring on slopes
Whether you’re a homeowner or contractor, posts are the project.
PrimeAlux notes two installation methods: underground or on-ground. That choice affects how you manage height and slope.
Contractor notes
- Underground posts: You typically have more freedom to fine-tune panel height relative to grade, but you must respect local frost depth and soil conditions.
- On-ground posts (surface mount): Great for concrete and hardscapes, but you need careful layout so the fence doesn’t look like it’s “floating” uphill or burying itself downhill.
Either way, the goal is the same: consistent spacing, plumb posts, and a straight top line that matches your design intent.
Managing bottom gaps without making the fence look weird
Bottom gaps are the number one complaint on sloped installs.
Options that keep things looking premium:
- Use stepped sections where the gap would exceed your comfort threshold.
- Blend approaches: rack along the gentle stretch, then step at the steep corner.
- Grade lightly along the fence line if the site allows, so the bottom edge reads consistent.
If your fence is meant to be more enclosed (privacy fence), bottom gap management becomes even more important. PrimeAlux offers Privacy fence, Privacy Plus fence, and Semi-Privacy fence configurations, so you can match openness to the job, but the slope detailing still decides whether it feels finished.
Rackable vs stepped for Privacy fence, Privacy Plus fence, and Semi-Privacy fence
Think of the fence style as setting your tolerance for visual gaps and transitions.
- Privacy and Privacy Plus: These usually look best when the bottom line is controlled. If you have steep grade, stepping often produces a cleaner, more intentional outcome.
- Semi-Privacy: Can be more forgiving visually, especially if the goal is airflow and a lighter look. Depending on the pattern, racking can look very natural on gradual slopes.
PrimeAlux presents these three configurations as distinct options and positions Privacy Plus as the “added strength and stability” configuration within the lineup.

Gate planning on slopes
Gates and slopes are a classic mistake point because gates want to swing square, while the ground is doing its own thing.
PrimeAlux states its gates come pre-assembled and can be size-modified, with several listed sizes.
Contractor notes
- Avoid placing a gate right at the steepest section if you can.
- Plan for swing clearance so the gate doesn’t drag.
- Treat gate posts like structural posts. Sloped sites amplify sag problems.
What PrimeAlux does differently for sloped installs
- System approach: PrimeAlux describes a premium modular system that is ready to assemble, intended to save installation time and reduce long-term maintenance.
- Slope and curve support: Accessories for slope hardware that allow installation at angles up to 45 degrees for sloped paths, and a Flexi accessory that allows installation at angles up to 28 degrees for curved paths, fitting between posts for stability.
- Installation flexibility: Systems can be installed underground or on-ground, which helps on mixed surfaces like soil, concrete edges, and hardscape transitions.
- Finish options: PrimeAlux lists standard finishes including Natural Walnut (WU-0384), Walnut (WU-0112), Grey Walnut (WU-0201), Dark Walnut (WU-0497), and Solid Metallic (PL-0598), and describes structural components as powder coated with pickets 3-layer coated for durability.
If you want a clean result, the fastest way to mess up “how to install an aluminum fence” is to treat a sloped yard like a flat yard. Decide early whether your run should be rackable, stepped, or a blend of both. Then plan layout, posts, and gate locations around grade changes.
With a modular system that supports slope transitions, underground or on-ground installs, and purpose-built accessories like PrimeAlux’s slope hardware and Flexi component, you can keep a premium look even when the yard is doing something complicated.